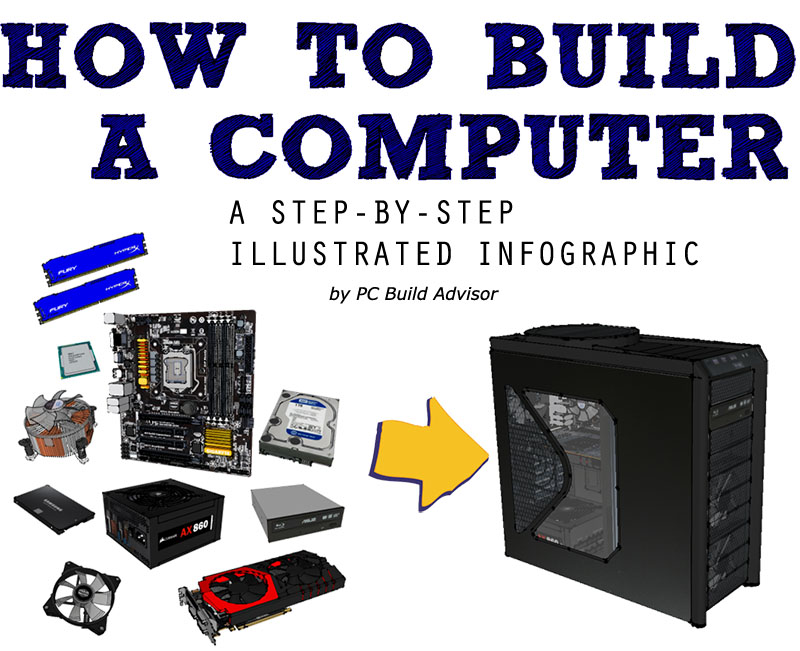
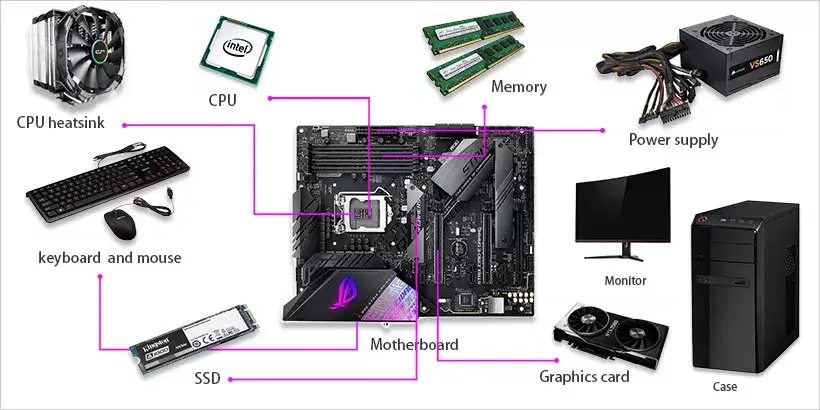
Assembling the PC

Building your own PC is a rewarding experience, but meticulous attention to detail is crucial. This step-by-step guide will walk you through the assembly process, minimizing the risk of errors and ensuring a smooth boot-up. Remember to ground yourself to avoid static electricity damage to components.
The assembly process begins with installing the CPU, followed by the cooler, RAM, and then connecting the power supply. Each step requires precision and care to prevent damage.
CPU Installation
Installing the CPU is the first and arguably most critical step. Begin by carefully opening the CPU socket lever on your motherboard, ensuring it’s fully unlocked. Align the CPU’s notch with the corresponding key on the socket, then gently lower the CPU into the socket, ensuring it sits flush. Close the lever securely.
CPU Cooler Installation and Thermal Paste Application
Proper cooler installation is vital for preventing overheating. Most CPU coolers come with pre-applied thermal paste; however, if yours doesn’t, apply a small pea-sized amount of high-quality thermal paste to the center of the CPU. Avoid excessive paste, as this can hinder heat transfer. Carefully align the cooler with the CPU and secure it according to the manufacturer’s instructions. An illustration would show the CPU with a small dot of thermal paste in the center, the cooler positioned over it, and then the cooler secured by screws or a clamping mechanism. Incorrect application might show excessive paste spreading unevenly, potentially leading to poor heat dissipation and eventual CPU damage.
RAM Module Installation
Installing RAM is straightforward, but proper orientation is crucial. Each RAM module has a notch that corresponds to a key on the RAM slot. Align the notch with the key and gently push the module down until it clicks into place. Consult your motherboard manual for the correct RAM slot configuration to ensure optimal performance, particularly if using multiple modules. An illustration could depict a RAM module being inserted into a DIMM slot, highlighting the notch and key alignment. An incorrect image would show the module being forced into the slot at an angle, potentially causing damage.
Power Supply Cable Connection and Management
Connecting the power supply cables requires careful attention to detail. Each cable is color-coded and designed for specific components. Connect the 24-pin ATX power connector to the motherboard, the 4-pin or 8-pin EPS power connector to the CPU, and the SATA power connectors to the hard drives and SSDs. Proper cable management improves airflow and aesthetics. An illustration could depict the various power cables neatly routed and connected to their respective components, emphasizing the correct orientation of connectors. A contrasting illustration would show tangled and poorly routed cables, obstructing airflow and potentially leading to overheating.
Installing the Operating System

With your new PC assembled, the next crucial step is installing the operating system (OS). This process brings your hardware to life, providing the platform for all your software and applications. Choosing between Windows and Linux depends on your preferences and needs; both offer robust and reliable options. This section will guide you through the process, regardless of your OS choice.
The initial hurdle is creating a bootable USB drive containing your chosen operating system’s installation files. This USB drive will serve as the primary source from which your computer will boot and install the OS onto the hard drive.
Creating a Bootable USB Drive
Creating a bootable USB drive involves using an ISO image of your chosen operating system and a suitable tool. For Windows, the Media Creation Tool is the official method. For Linux distributions, tools like Rufus (Windows) or Etcher (cross-platform) are popular and reliable choices. The process generally involves selecting the ISO file, choosing your USB drive (carefully!), and initiating the creation process. The software will format the drive and copy the necessary files, making it bootable. Always back up any important data on the USB drive beforehand, as the process will erase all existing data.
Installing Windows 10/11
Once your bootable USB is ready, insert it into your PC and power on. You’ll need to enter the BIOS/UEFI settings (usually by pressing Delete, F2, F10, or F12 during startup – check your motherboard’s manual) to change the boot order, prioritizing the USB drive. After saving the changes and restarting, the Windows installer should launch.
- Follow the on-screen instructions, selecting your language and region.
- Accept the license terms.
- Choose “Custom: Install Windows only (advanced)” to perform a clean installation.
- Select the drive where you want to install Windows. Caution: Ensure you select the correct drive; selecting the wrong one will erase all data on that drive.
- The installation process will begin and may take some time. Your PC will likely restart several times.
- After installation, you’ll be prompted to create a user account and personalize your settings.
Installing a Linux Distribution
The process for installing a Linux distribution is similar, but the specifics may vary depending on the distribution (e.g., Ubuntu, Fedora, Mint). Generally, you’ll boot from the USB drive, navigate a graphical or text-based installer, and follow the on-screen instructions. Key steps often include:
- Selecting your language and keyboard layout.
- Choosing your installation type (typically a “minimal” or “desktop” installation).
- Partitioning your hard drive. This step can be complex; many distributions offer automated partitioning options for beginners. However, understanding the process is crucial to avoid data loss.
- Creating a user account.
- The installation will proceed, and your system will reboot once complete.
Installing Drivers
After installing the operating system, it’s crucial to install the latest drivers for all your hardware components (motherboard, graphics card, network adapter, etc.). These drivers ensure optimal performance and functionality. Most motherboard manufacturers provide driver packages on their websites. Similarly, graphics card manufacturers (like NVIDIA or AMD) offer their drivers directly. Windows Update often automatically installs some drivers, but manually checking for and installing the latest versions from the manufacturer’s website is recommended for optimal performance and stability.
Essential Software Applications
Once your operating system is fully functional and drivers are installed, it’s time to install essential software applications. This will vary based on your needs, but some common choices include:
- Antivirus software: Protects your system from malware and viruses.
- A web browser: For accessing the internet (e.g., Chrome, Firefox, Edge).
- Office suite: For productivity tasks (e.g., Microsoft Office, LibreOffice).
- A media player: For playing audio and video files (e.g., VLC Media Player).
- A compression utility: For archiving and compressing files (e.g., 7-Zip).
Testing and Troubleshooting

The culmination of your PC building journey arrives with the crucial testing phase. This isn’t simply powering on the machine; it’s a systematic process of verifying each component’s functionality and identifying potential issues before they escalate into major problems. Thorough testing ensures stability and longevity for your new build.
After powering on your newly assembled PC, a successful POST (Power-On Self-Test) is the first sign of success. This involves the computer’s BIOS (Basic Input/Output System) checking the essential hardware components. However, a successful POST doesn’t guarantee everything is working perfectly. A more comprehensive evaluation is required to ensure optimal performance and stability.
Initial System Checks
The initial checks focus on verifying basic functionality. These are crucial first steps in ensuring the core components are communicating effectively.
- Visual Inspection: Check for any loose cables, incorrectly seated components, or any signs of physical damage. Pay close attention to the RAM, graphics card, and power supply connections.
- POST and BIOS Access: Verify the system boots and you can access the BIOS settings. This confirms the CPU, RAM, and motherboard are interacting correctly.
- Boot Device Selection: Ensure the system boots from the intended drive (SSD or HDD) and the operating system loads correctly. If using multiple drives, confirm boot order in the BIOS settings.
- Device Manager Check (Windows): Once the OS is loaded, open Device Manager to verify all hardware is detected and functioning without errors. Yellow exclamation marks indicate potential issues that need further investigation.
Hardware Troubleshooting Methods
Encountering problems is part of the process. Systematic troubleshooting helps isolate the source of the issue.
- Isolate Components: If the system fails to boot, try removing components one by one (e.g., RAM sticks, graphics card) to see if that resolves the problem. This helps pinpoint the faulty component.
- Reseat Components: Loose connections are a common cause of issues. Carefully reseat all components, ensuring they are properly secured. Pay particular attention to the CPU, RAM, and graphics card.
- Power Supply Testing: A faulty power supply can cause a range of problems. Use a multimeter (if you have one) to check the power supply’s voltage outputs. If possible, test with a known good power supply.
- BIOS Update (If Necessary): An outdated BIOS can sometimes cause compatibility issues. Check the motherboard manufacturer’s website for BIOS updates. Proceed with caution, as updating the BIOS incorrectly can brick your motherboard.
Software Troubleshooting Methods
Software problems can manifest in various ways, from application crashes to system instability.
- Driver Updates: Outdated or corrupted drivers are a frequent source of problems. Update all drivers from the manufacturer’s website.
- Operating System Reinstallation: If software issues persist after troubleshooting, a clean operating system reinstallation can resolve deep-seated problems. Back up important data before attempting this.
- Malware Scan: Run a full system scan with a reputable anti-malware program to rule out any malicious software affecting performance or stability.
- System Restore: If the problem started recently, use Windows’ System Restore feature to revert to a previous stable point.
System Monitoring and Performance Evaluation
Regular monitoring of system temperatures and performance helps identify potential issues before they become critical. This proactive approach ensures optimal system health.
- Temperature Monitoring: Use software like HWMonitor or Core Temp to monitor CPU and GPU temperatures. High temperatures can indicate inadequate cooling or hardware problems. Acceptable temperatures vary by component, but generally staying below 80°C (176°F) for CPU and GPU is advisable under load.
- Performance Monitoring: Use tools like Task Manager (Windows) or Activity Monitor (macOS) to monitor CPU and memory usage. High and sustained usage can indicate resource-intensive applications or potential bottlenecks.
- Benchmarking: Run benchmark tests (e.g., 3DMark, Cinebench) to assess the system’s overall performance and compare it to expected results based on the hardware specifications. This provides a quantifiable measure of performance.
PC Functionality Checklist
This checklist summarizes the key areas to verify after building your PC.
| Component | Test | Expected Result |
|---|---|---|
| CPU | Check CPU temperature under load, verify clock speed in BIOS/OS | Temperature within safe range, correct clock speed |
| RAM | Check RAM capacity and speed in BIOS/OS, run memory test | Correct capacity and speed, no errors in memory test |
| Motherboard | Verify all ports (USB, audio, etc.) are functional, check BIOS settings | All ports functional, BIOS settings configured correctly |
| Graphics Card | Test graphics performance with a benchmark, check display output | Acceptable frame rates in benchmark, correct display output |
| Storage (HDD/SSD) | Check storage capacity, run disk check for errors | Correct capacity, no errors reported |
| Power Supply | Check voltage outputs (if using a multimeter), monitor power consumption | Voltage outputs within specifications, power consumption within expectations |
| Operating System | Verify OS functionality, check for updates | OS boots correctly, updates installed |